NetTalk WebServer - Themes
NetTalk 6 introduces the concept of Themes. Themes are related to Styles in
the sense that both are made up of CSS files. Themes however can be changed
at runtime, whereas Styles are fixed at compile time. Themes make it easier for you to manage the visual look of your application, as well as experiment
with different looks at runtime.
NEW: In NetTalk 5 you needed to copy
your web folder with each NetTalk update. In NetTalk 6 this happens
automatically, the first time you generate your app after updating NetTalk.
So the default themes will appear in your web folder as soon as you compile
your application. This reinforces the directive though to NOT edit any of
the shipping files but rather to add additional files of your own.
The desktop themes in NetTalk are based on the themes provided by jQueryUI.
These themes ultimately consist of a jQueryUI theme file, a NetTalk theme
file, and optionally one or more of your own theme files as well.
themes are created, and maintained, using
ThemeRoller.
Mobile themes
are based on themes provided by jQueryMobile. Mobile themes are quite
different to desktop themes though, and use a different tool, called
ThemeRoller Mobile.
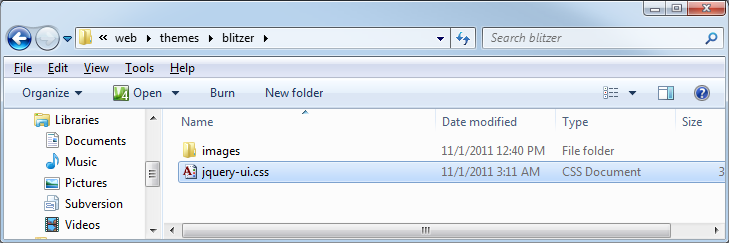
Themes are stored in the \web\themes\themename folder.
As you may know, the order of styles in the page is important. Multiple
styles can be applied to a single HTML element, and where those styles clash
with each other the simple rule "last man wins" applies. So styles declared
later get preference over styles created earlier.
Since style files can
originate in the themes folder, and the styles folder, and consist of both
NetTalk and custom files, it's occasionally useful to know the order in
which the files are applied. This order applies to both the split mode, and
the files created by GZipall.
- \themes\themename\jQuery-ui.css (or jquery.mobile.css)
- \styles\shipping NetTalk CSS files
- \themes\themename\Nettalk-ui.css (or nettalk-mobile.css)
- \styles\your custom CSS files ("included in ALL.CSS" - For All
Browsers)
- \themes\themename\your custom CSS files
- \styles\your custom CSS files ("not included in ALL.CSS" - For All
Browsers)
- \styles\shipping NetTalk CSS files (Browser Specific)
- \styles\your custom CSS files (Browser Specific)
From
the above list you can see that your custom theme files override (where
applicable) your custom style files.
In NetTalk 5 a supplied GzipAll Batch file is used to join, and compress the
all.css file. If you added style files to your application, or wanted to change the
theme, then you would need to manually alter the GZipAll batch file yourself.
In NetTalk 6 this step would be a lot more complicated because in addition to the all.css file, you also need to take care of the allmobile.css file, and each of the theme folders as well. Since the theme folders can grow, by you adding more possible
themes, the maintenance of this file is a problem.
In NetTalk 6 the GzipBat file is created, and re-generated for you, based on the files you've added to the WebServer procedure, and also based on the themes you've
added to the \web\themes folder. In some cases (if the web folder is out of
date, or if a new theme is detected) then the batch file will be run
automatically for you. However if you change a theme, add files to themes,
or edit one of the css files in a theme, then you should run the Gzipall
batch file manually after the change.
The goal of the GzipAll batch file is to create combined, minified and
compressed versions of the .js and .css files. Combining the files means
fewer round-trips between the browser and server, minifying removes any
unnecessary white-space from the files (making them smaller) and compressing
them makes them even smaller (for those browsers that can accept gzipped-compressed
files).
The Gzip.Bat file creates the following files for each Theme;
- Theme.Css - a Minified, combined, css file for the theme, for the
desktop
- MobileTheme.Css - the same as (1) , but for mobile browsers
- Theme.Fat.Css - The same as 1, but not minified. (This file is never
used, it's supplied for debugging purposes)
- MobileTheme.Fat.Css - The same as (2) but not minified. (This file
is not used, it's supplied for debugging purposes)
- Theme.Css.Gz - Same as (1) but Compressed with Gzip
- MobileTheme.Css.Gz - Same as (2) but compressed with Gzip
This section is for creating desktop themes. For creating mobile themes see the section,
Add a Mobile Theme using Mobile ThemeRoller. If you wish to continue editing an existing theme see the section,
Edit a ThemeRoller Theme.
- Themeroller is an online tool that allows you to download standard jQueryUI themes, or to download a theme you have created.
Start by going to the Themeroller web page -
http://jqueryui.com/themeroller/
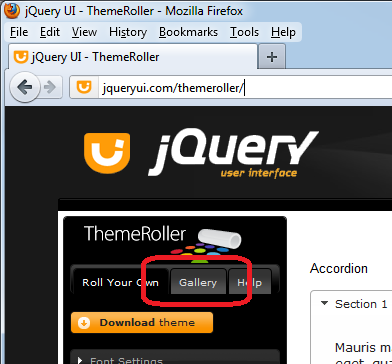
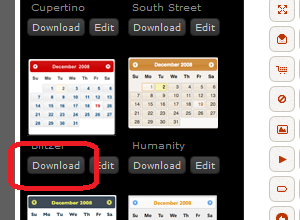
- Click on the Gallery tab to see a list of the pre-built themes that
jQueryUI offers. Four of these themes have already been downloaded for
you, and are automatically part of your web folder. They are UI
Lightness, Smoothness, Redmond and Sunny. Feel free to pick one of the
other themes, and click on the download link just below it.
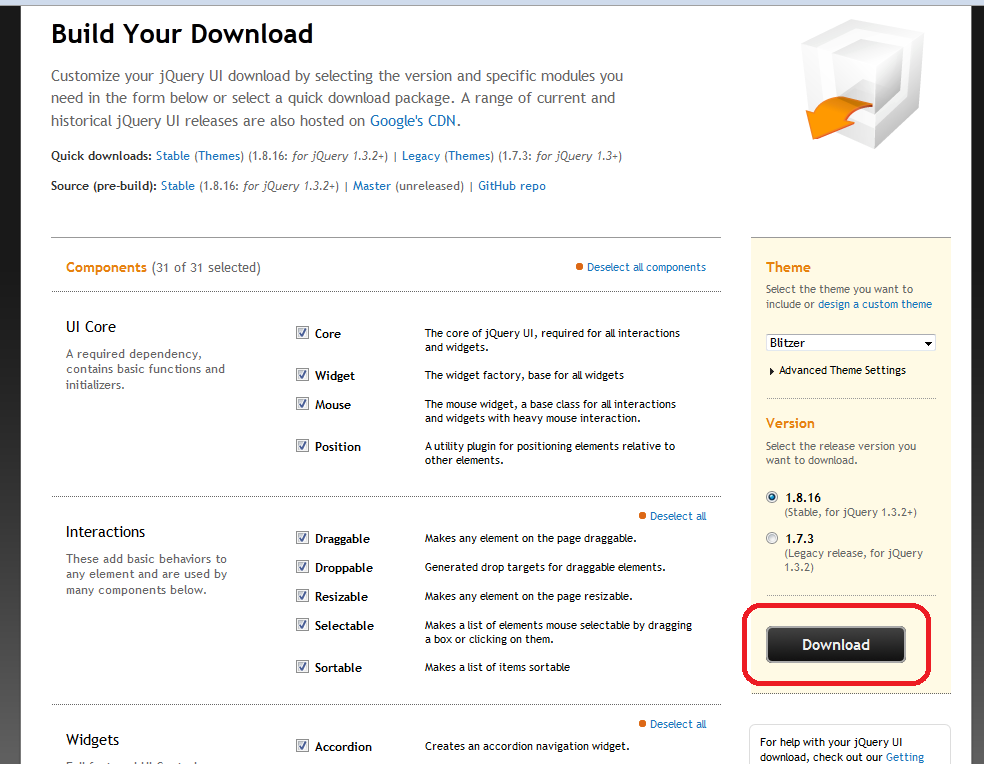
- Clicking on the download link takes you to a page entitled Build
Your Download. You can leave all the settings on this page as they are,
and click on the big Download button.
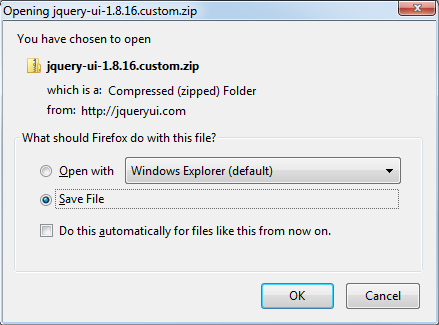
- After clicking on the Download button, your browser will typically
ask you if you want to Save or Open the file. For now choose Save.
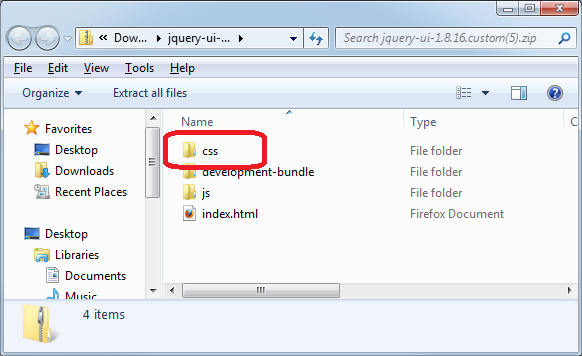
- Once the ZIP file has been downloaded, open it. (Usually just double
clicking on the file will open it). The Zip file contains a number of
folders, but it's only the CSS folder we're interested in at the moment.
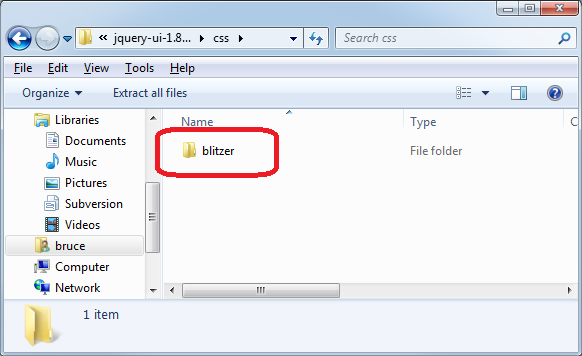
- Inside the css folder is the name of the theme that you downloaded.
Right-click on the name and choose the COPY command.
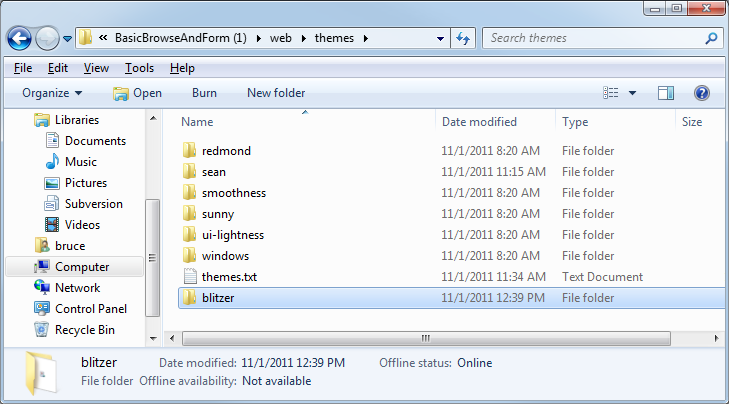
- Go to your application's web folder, into the new themes folder,
right-click and choose paste. Your new theme should be visible there in
the list of themes.
- Double click this new folder name, to go inside the new folder.
Notice that the name of the CSS file contains the jQuery UI version
number.
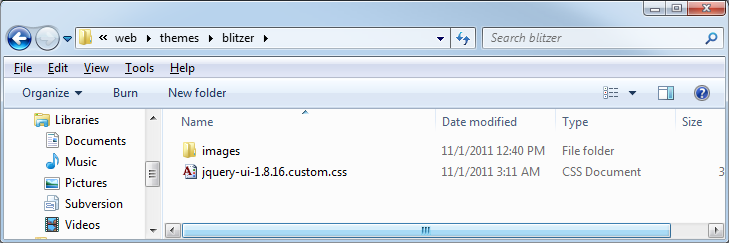
- Right-click on this name and rename the file to jquery-ui.css
- At this point open your application in Clarion and click on the
Generate or Compile button. This will copy an additional file into the
themes folder for you (called nettalk-ui.css), and will also add your
new theme to the Gzipall.Bat file.
In Summary, the steps to add a theme are;
- Download (from Themeroller)
- Copy (into the Web\themes folder)
- Rename (to remove the version number part)
- Regenerate your application
If you have created a theme in ThemeRoller, you may want to go back at some point and edit that theme further.
At first glace it appears that you can't do this - ThemeRoller starts with one of the pre-defined themes.
However ThemeRoller does have a mechanism so that you can "start" an editing session with your current theme.
If you look inside the css file you will find a comment containing the words
To view and modify this theme,
followed by a really long URL. By copying this URL to your browser, you will pass all the current settings
to ThemeRoller, and you'll be able to continue editing the theme.
This section describes the steps for creating, and using, a mobile theme using ThemeRoller Mobile. If you want
to create a desktop theme, check out the section
Add a Theme using ThemeRoller.
- Themeroller Mobile is an online tool that allows you to download standard jQuery
mobile themes, or to download a theme you have created.
Start by going to the Mobile Themeroller web page -
http://jquerymobile.com/themeroller/
- Edit the theme to create the look you are after.
- Once you have completed the theme to your satisfaction, click on the
Download button.
- The download dialog will appear, prompting you for a theme name, and
once that is entered you can click on the Download Zip
button.
- Once the Zip file has been downloaded, open it with Windows Explorer and
navigate inside it into the Themes folder. Inside this file you will find 2
css files, yourtheme.css and yourtheme.min.css. You can use either one, the
min one is harder to edit by hand, but is smaller (so is recommended.)
- Copy this css file into your theme folder (\themes\whatever)
as jquery.mobile.theme.css
- Manually run the Gzipall.Bat file which is
in your application folder.
As you probably know by now, it's not a good idea to directly edit files
that ship as part of NetTalk. So a mechanism exists to allow you to add your
own CSS files to the themes. To add a file, open your application, go to the
WebServer procedure to the NetTalk extension.
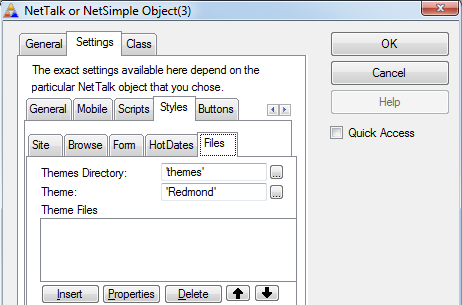
You will find the Theme
settings on the
Settings / Styles / Files
tab.
On this tab you can set the name of your default theme, and you
can add additional css files to the list. these additional files (ie your
files) are placed in the folder, with the two standard files, for each
theme. It's important that the file is copied into all the theme folders
that you support. It's likely that you will tweak the file somewhat between
themes, so be sure to have a suitable backup process in place.
Items added
on this tab are automatically added into the GzipAll file when your
application next re-generates. However the Gzipall.Bat file is not run
automatically on each build, so remember to run it manually after compiling
your application (if you have changed anything on this list.)
To a large extent you can add CSS files to either the Styles folder, or the
themes\themename folder, and the page will still work. However there is a
difference between the two types of files.
You should use the themes
folder when you want to support multiple themes, and the styles you are
adding may change if the theme changes. For example, say you were adding CSS
to give the browse a different color of highlight bar. Chances are this
color will change if the theme changes. So in this case you'd use the Theme
folder. On the other hand you may be adding some CSS related to a specific
widget, say a tooltip. In this case you want the tip to appear the same,
regardless of the theme, so you can place it in the Styles folder.
[End of this document]