The goal of this document is to describe specific tasks that you may need to
do, where those tasks don't fall easily into any of the other documents.
As described in the other documentation, it is possible to build your web
application based on a Frames approach, or a Page approach. The Frames
approach has the advantage of being faster in some cases, because less html
is required as you move around the application, however it also has the
disadvantage of not being very suitable when browsing with a small screen
(such as a phone). With the improvements in CSS support, and overall
template support, it is desirable in some cases to change the application
from using Frames, to one using pages. Fortunately this change is
straight-forward, and doesn't not involve much work in the application.
This
section will describe the process, by converting example Accounts (31) to
example Books (71). Since your application may be slightly different to the
example you may, or may not, need to perform all these steps in your own
app.
Menu Procedure / Header
- Rename the menu page (MenuOnLeft) procedure to PageHeaderTag. Change
the template type of this new PageHeaderTag procedure from NetWebPage to
NetWebSource. Tick on the option This is a HEADER, and clear the CSS
setting. Tick on the Declare Globally option.
- Remove the Target Frame setting from all the menu
options. They are likely set to something like 'right_fram'
- and this needs to be removed. (Targets set to
'_blank' should be left alone.) Check any other procedures you
may have that set the Target Frame as well, specifically check your
Login procedure if you have one. In the Accounts example the IndexPage
buttons all point to '_self_' which can also
be removed. You may also find references to the target in the xHtml in
the FrameHeader and FrameFooter procedures.
-
Copy and Paste the xHtml from the FrameHeader procedure into the
PageHeaderTag procedure. In the Frame version of the application the
header and menu procedures are separate, but in the page based
application they are combined.
-
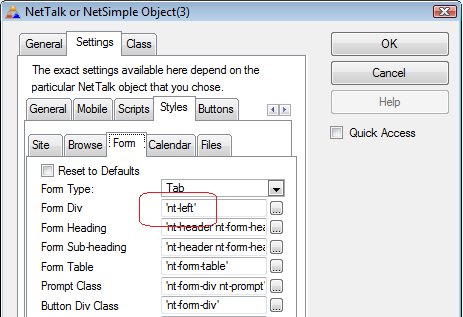
Go to the Menu extension, CSS tab, TaskPanel tab, set
Menu Div to 'nt-left'. This
causes the TaskPanel menu to float to the left hand side of the window,
and the browses and forms etc to appear to the right of it.
-
On the menu extension, CSS tab, make sure the option to Wrap Menu in
Table is off.
-
Tip: If you have other xHTML embedded in the PageHeaderTag, make sure
that each xHtml entry has a Location set.
Footer Procedure
- If your frame app has a footer, and the footer is in its own frame,
then rename the FrameFooter procedure to PageFooterTag, and change it from a
NetWebPage to a NetWebSource.
- Make sure your footer procedure has the option This is a FOOTER
on, and
clear the CSS class setting. Tick on the Declare Globally option.
IndexPage
The IndexPage is the first procedure the user will see when they go to
your site. This is usually a NetWebSource procedure, but it could also be a
NetWebForm, NetWebBrowse, or indeed even a static page on the disk. You can
inspect your FrameSet procedure to see what is currently being used as the
default in the "main" frame. This is usually the starting point for the
Index page.
In the Accounts example the starting page is a NetWebForm, so there is
nothing to do.
However if your starting page is a NetWebPage then you will
need to add the tags;
<!-- Net:PageHeaderTag -->
and <!-- Net:PageFooterTag --> to the xHtml.
If your starting page is a static html page in the web folder, then
you will need to add <!-- Net:PageHeaderTag -->
and <!-- Net:PageFooterTag --> to the
appropriate places in the page, and make sure the page has
<!-- NetWebServer --> on the first line.
Whatever the name of this first procedure, that is the name you must
set in the WebServer procedure, in the Default Page
setting.
WebServer Procedure
- In the WebServer procedure, Set the Generic Page Header Tag
and Generic Page Footer Tag to
'<!-- Net:PageHeaderTag -->' and
'<!--
Net:PageFooterTag -->' respectively.
- Change the Default
Page option to
match the name of the site's IndexPage.
- Change the Form Div default style to 'nt-left'
Signatures can be added to the form to allow the user to enter a free-form
signature using a mouse, or (more usefully) a touch-screen with a stylus or
finger. The image data as sent from the browser is a vector format. To
convert the image vector format to another format a small procedure in your
application is used. Note that the vector format may be extended from time
to time, so it is important to keep this procedure up to date. (Changes will
be announced in the Version History, and will point to this article.)
Vector Format
The vector data takes one of the following forms;
Z{XnYnWnHn-XnYnWnHn-...-XnYnWnHn}or
Y{XnYnWnHn~XnYnWnHn~...~XnYnWnHn}
where
n is a numeric number, and
... represents an unknown number of nodes. All
other characters are as written.
- The first character in the format determines which format is being used
- The complete data is wrapped in { and } characters - which allows
the developer to note when the data has been truncated.
- The drawing is represented as a variable number of nodes, each node
consisting of a starting X and Y position, and an ending X and Y
position (stored in W and H respectively). Connecting
these nodes together effectively forms the signature.
- The Z format uses - as the point separator, the Y format uses ~ as
the point separator. This allows the Y format to support negative X, Y,
W and H values.
Sample Conversion Code
There are many ways to create images in Clarion - the exact code will vary
depending on the method you choose to use. However the following annotated
sample code should help regardless of the method you prefer. This
example makes use of Draw and StringTheory to simplify the code
required.
SigToImage PROCEDURE (String pSig,
Long pWidth, Long pHeight, String pFileName)
drw
Draw
Window
WINDOW('Caption'),AT(,,200,60),GRAY
IMAGE,AT(0,0,200,60),USE(?Draw)
END
st StringTheory
liner StringTheory
ln
Long
x Long
y Long
w
Long
h Long
CODE
! Draw will construct the image into a Clarion Image
control, then save that image as a file.
! So start by opening
a window (hidden), and setting the appropriate sized
OPEN(window)
window{prop:pixels} = 1
window{prop:width}
= pWidth
window{prop:height} = pHeight
?Draw{prop:width}
= pWidth
?Draw{prop:height} = pHeight
drw.Init(?Draw)
st.SetValue(pSig)
IF st.Sub(1,1)
= 'Z'
st.Remove('Z[{{')
st.Split('-')
ELSIF st.Sub(1,1)
= 'Y'
st.Remove('Y[{{')
st.Split('~')
END
drw.Blank(color:white)
drw.SetPenColor(color:black)
drw.SetPenWidth(1)
LOOP ln = 1 TO st.Records()
liner.SetValue(st.GetLine(ln))
x = liner.Between('X','Y')
y = liner.Between('Y','W')
w = liner.Between('W','H') - x
h = liner.After('H') - y
drw.Line(x,y,w,h)
END
drw.Display()
drw.WriteBMP(pFileName)
drw.Kill()
CLOSE(window)